Chapter 10: Visualising Solid Shapes
Chapter 10: Visualising Solid Shapes
Introduction to Solid Shapes
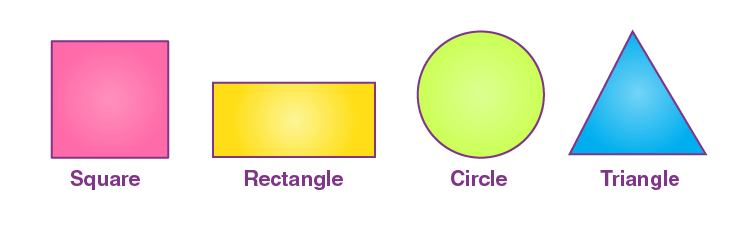
The chapter Solid Shapes begins by distinguishing between 2D and 3D shapes. Two-dimensional shapes, such as circles, triangles, and rectangles, have only length and breadth, and they lie flat on a plane. Three-dimensional shapes, or solids, have length, breadth, and height, occupying space. Examples of 3D shapes include cubes, cuboids, cylinders, cones, spheres, and prisms. The chapter emphasizes that understanding solid shapes is essential in real life, as objects like books, boxes, balls, and bottles are all 3D shapes.
To help students visualize solids, the chapter uses everyday objects. For instance, a book is likened to a cuboid, a football to a sphere, and a tin can to a cylinder. This approach makes the abstract concept of 3D shapes relatable and easier to grasp. The chapter also introduces the idea that solids can be represented in 2D through drawings, which is a key skill for visualizing and understanding their structure.
Components of Solid Shapes
A significant portion of the chapter is dedicated to explaining the components of 3D shapes: faces, edges, and vertices.
-
Faces: These are the flat surfaces of a solid shape. For example, a cube has 6 faces, all of which are squares.
-
Edges: These are the lines where two faces meet. A cube has 12 edges.
-
Vertices: These are the points where edges meet, often referred to as corners. A cube has 8 vertices.
The chapter provides examples to illustrate these components. For a cuboid, students learn that it has 6 faces (rectangular), 12 edges, and 8 vertices. Similarly, a triangular prism is described as having 5 faces (2 triangular and 3 rectangular), 9 edges, and 6 vertices. These examples help students understand how to count and identify the components of various solids.
Polyhedrons and Non-Polyhedrons
The chapter introduces the concept of polyhedrons, which are 3D shapes with flat polygonal faces, straight edges, and vertices. Polyhedrons are further classified into regular and irregular polyhedrons. A regular polyhedron has all faces identical and regular (e.g., a cube, where all faces are identical squares). Irregular polyhedrons, like a triangular prism, have faces that are not all identical.
Non-polyhedrons, on the other hand, are solids with curved surfaces, such as cylinders, cones, and spheres. The chapter clarifies that these shapes do not qualify as polyhedrons because their surfaces are not flat polygons. For example, a cylinder has two circular faces and one curved surface, making it a non-polyhedron.
To reinforce this distinction, the chapter includes activities where students identify whether a given shape is a polyhedron or not. For instance, a cube is a polyhedron, but a sphere is not. This classification helps students understand the structural differences between various 3D shapes.
Euler’s Formula
One of the key mathematical concepts introduced in the chapter is Euler’s Formula, which applies to polyhedrons. The formula states: [ F + V = E + 2 ] where:
-
( F ) is the number of faces,
-
( V ) is the number of vertices,
-
( E ) is the number of edges.
This formula is a powerful tool for verifying the properties of polyhedrons. The chapter provides examples to demonstrate its application. For instance, for a cube:
-
Faces (( F )) = 6,
-
Vertices (( V )) = 8,
-
Edges (( E )) = 12.
Plugging these values into Euler’s Formula: [ 6 + 8 = 12 + 2 ] [ 14 = 14 ]
The equation holds true, confirming that the cube is a valid polyhedron. Similarly, the formula is applied to other polyhedrons like tetrahedrons and prisms. The chapter includes exercises where students apply Euler’s Formula to various shapes, reinforcing their understanding of the relationship between faces, vertices, and edges.
Representation of 3D Shapes in 2D
A major focus of the chapter is on visualizing and representing 3D shapes on a 2D plane. This is essential for drawing solids and understanding their structure. The chapter introduces several methods for this purpose:
-
Oblique Sketches: These are simple 2D drawings that represent a 3D shape without using precise measurements. For example, a cube can be drawn as a square with lines extending to show depth, giving a rough 3D appearance. The chapter provides step-by-step instructions for drawing oblique sketches of cubes and cuboids, emphasizing that these sketches are not to scale but help visualize the shape.
-
Isometric Sketches: These are more accurate representations drawn on isometric dot paper, where the angles between the axes are equal (typically 120 degrees). Isometric sketches maintain the proportions of the solid, making them more precise than oblique sketches. The chapter includes activities where students practice drawing isometric sketches of cubes, cuboids, and prisms using dot paper.
-
Nets: A net is a 2D shape that can be folded to form a 3D solid. For example, the net of a cube consists of 6 squares arranged in a cross pattern. The chapter explains how to identify and draw nets for various solids, such as cuboids, prisms, and pyramids. Students are encouraged to cut out and fold nets to verify that they form the intended 3D shape. This hands-on activity helps solidify their understanding of how 2D shapes relate to 3D solids.
Views of 3D Shapes
The chapter also discusses different views of 3D shapes, which are essential for understanding how solids appear from various perspectives:
-
Top View: What the shape looks like from above.
-
Front View: What the shape looks like from the front.
-
Side View: What the shape looks like from the side.
For example, the top view of a cylinder is a circle, while the side view is a rectangle. The chapter provides examples of different solids, such as cuboids and cones, and asks students to identify their views. This concept is particularly useful in real-world applications, such as architecture and engineering, where understanding different perspectives of an object is crucial.
Exercises and Activities
The chapter includes a variety of exercises to reinforce the concepts. These include:
-
Identifying the number of faces, edges, and vertices for given solids.
-
Verifying Euler’s Formula for various polyhedrons.
-
Drawing oblique and isometric sketches of solids.
-
Constructing nets for cubes, cuboids, and prisms.
-
Determining the top, front, and side views of 3D shapes.
These exercises are designed to be interactive, encouraging students to draw, fold, and visualize shapes. The chapter also includes real-life applications, such as identifying the shapes of objects like dice (cube), ice-cream cones (cone), and matchboxes (cuboid), to make the learning experience engaging.
Some realistic examples..
1. Identifying Faces, Edges, and Vertices
- Example: A Dice A standard six-sided dice is a cube. A cube has:
- Faces: 6 (each face is a square, representing numbers 1 to 6).
- Edges: 12 (the lines where the faces meet, such as the edges along the sides of the dice).
- Vertices: 8 (the corners of the dice). Students can count these components by examining a physical dice, reinforcing the concept of a cube as a polyhedron.
- Example: A Shoebox A shoebox is a cuboid, commonly used to store shoes. It has:
- Faces: 6 (all rectangular, including the top, bottom, front, back, and two sides).
- Edges: 12 (the lines where the rectangular faces meet, such as the edges along the box’s length, width, and height).
- Vertices: 8 (the corners where the edges meet, like the corners of the box). This example helps students visualize a cuboid in a familiar context.
2. Applying Euler’s Formula
Euler’s Formula (F+V=E+2 F + V = E + 2 ) can be applied to polyhedrons in real-life objects.
- Example: A Triangular Prism (Toblerone Chocolate Bar) A Toblerone chocolate bar has the shape of a triangular prism. For a triangular prism:
- Faces (F F ): 5 (2 triangular bases and 3 rectangular lateral faces).
- Vertices (V V ): 6 (3 vertices on each triangular base).
- Edges (E E ): 9 (3 edges on each triangular base and 3 edges connecting the bases). Applying Euler’s Formula: 5+6=9+2 5 + 6 = 9 + 2 11=11 11 = 11 This confirms the formula holds true, and students can verify it by examining the packaging of a Toblerone bar.
- Example: A Cardboard Box (Cube-Shaped) A cube-shaped cardboard box, like those used for small gift items, has:
- Faces: 6 (all squares).
- Vertices: 8.
- Edges: 12. Using Euler’s Formula: 6+8=12+2 6 + 8 = 12 + 2 14=14 14 = 14 Students can use a small cube-shaped box to count the components and verify the formula.
3. Nets of 3D Shapes
Nets are 2D shapes that can be folded to form 3D solids, and real-life examples help students understand this concept.
- Example: A Cereal Box (Cuboid) The net of a cereal box is made up of 6 rectangles arranged in a specific pattern (often a cross or a T-shape). When a cereal box is unfolded flat (e.g., during recycling), students can see how the rectangular faces are arranged to form the cuboid. They can cut out a net from paper and fold it to recreate the box, demonstrating how 2D shapes form a 3D solid.
- Example: A Party Hat (Cone) The net of a cone consists of a circular base and a sector of a circle for the curved surface. A party hat is a real-life example of a cone. Students can imagine cutting along the side of the hat and flattening it to reveal a sector (for the curved part) and a circle (for the base). They can create a paper net and fold it to form a cone, reinforcing the concept.
4. Views of 3D Shapes
Understanding different views (top, front, side) of 3D shapes is useful in real-world contexts like design and architecture.
- Example: A Water Bottle (Cylinder) A cylindrical water bottle provides a clear example of different views:
- Top View: A circle (the circular base of the bottle).
- Front View: A rectangle (showing the height and width of the bottle).
- Side View: A rectangle (identical to the front view for a cylinder). Students can observe a water bottle on their desk and sketch its views to understand how a 3D object appears from different angles.
- Example: A House Model (Cuboid with a Triangular Prism Roof) A simple house model with a rectangular base (cuboid) and a slanted roof (triangular prism) can be used to explore views:
- Top View: A rectangle (showing the base of the house and the outline of the roof).
- Front View: A rectangle with a triangle on top (representing the cuboid base and the triangular roof).
- Side View: A rectangle (showing the side of the cuboid and the roof’s slope). Students can visualize this by looking at a toy house or a small model and sketching its views.
5. Polyhedrons vs. Non-Polyhedrons
Distinguishing between polyhedrons (solids with flat polygonal faces) and non-polyhedrons (solids with curved surfaces) is a key concept.
- Example: A Football (Sphere, Non-Polyhedron) A football is a sphere, which has a curved surface and no flat faces, edges, or vertices in the traditional sense. This makes it a non-polyhedron. Students can compare a football to a dice (cube, a polyhedron) to understand the difference.
- Example: A Cardboard Pyramid (Tetrahedron, Polyhedron) A tetrahedral pyramid, like a decorative paperweight or a model made from cardboard, has 4 triangular faces, 6 edges, and 4 vertices, making it a polyhedron. Students can examine such an object to identify its flat faces and confirm it fits the definition of a polyhedron.
6. Oblique and Isometric Sketches
Drawing 3D shapes in 2D is a practical skill, and real-life objects can be used to practice.
- Example: A Rubik’s Cube (Oblique Sketch) Students can draw an oblique sketch of a Rubik’s Cube by starting with a square (representing one face) and adding diagonal lines to suggest depth. This gives a rough 3D appearance without precise measurements, making it a simple way to visualize the cube.
- Example: A Brick (Isometric Sketch) A brick, shaped like a cuboid, can be drawn on isometric dot paper to create a more accurate 3D representation. Students can use the dots to maintain equal angles and proportions, sketching the brick’s length, width, and height to reflect its real shape.
Download pdf notes and Sulutions of the Chapter:
Please Visit Readspot for Hindi Medium Study Material
You may also like

Chapter 1: Rational Numbers

Chapter 2: Linear Equations in One Variable
